
Discover the joy of creating homemade delights with this sourdough english muffins recipe. Perfect for breakfast or a snack, these muffins offer a unique flavor profile that’s both tangy and satisfying. Whether you’re a seasoned baker or new to sourdough, this guide makes the process simple and enjoyable.
This recipe takes you from starter activation to serving fresh, warm muffins. You’ll learn how to mix, knead, and ferment the dough, ensuring a perfect rise every time. Practical tips, like the scoop and level technique for measuring flour, make the process foolproof.
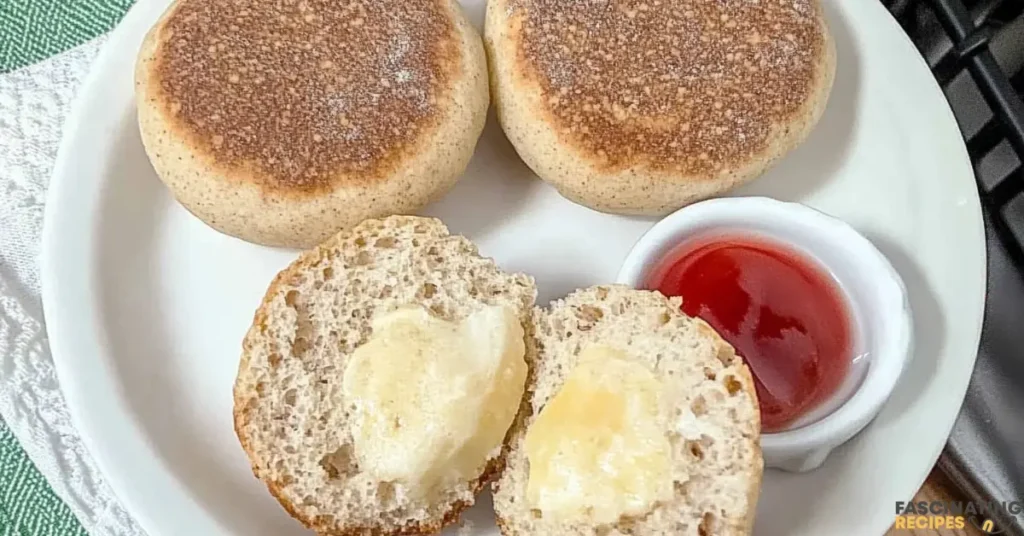
Serve your muffins with butter and cinnamon sugar, or use them as a base for sandwiches. You can also store extras for later, keeping them fresh or freezing for future use. Embrace the heritage of sourdough baking and enjoy the artisan style of these traditional treats.
Table of Contents
Key Takeaways
- Learn how to make sourdough English muffins from scratch.
- Follow step-by-step instructions for mixing, kneading, and cooking.
- Use the scoop and level technique for accurate flour measurement.
- Explore serving ideas like butter with cinnamon sugar or as a sandwich base.
- Store or freeze muffins to keep them fresh for later use.
Understanding Your Sourdough Starter
A healthy starter is the heart of any successful sourdough recipe. It’s what gives your dough its signature tang and ensures a perfect rise. Whether you’re using a family heirloom or starting fresh, knowing how to care for your starter is essential.
Feeding and Activating Your Starter
To activate your starter, feed it 12 hours before you plan to mix your dough. Combine equal parts flour and water, stirring until smooth. A vigorous starter will double in size and develop bubbles, indicating it’s ready to use. This process ensures your dough will rise properly and develop a rich flavor.
Signs Your Starter Is Ready
Look for visual cues to confirm your starter is active. It should be bubbly, slightly domed, and have a pleasant, tangy aroma. If it doubles in size within 4-6 hours after feeding, it’s ready to go. A strong starter is the secret to achieving the perfect texture and taste in your baked goods.
Gathering Essential Ingredients and Equipment
Quality ingredients and the right equipment make all the difference. Whether you’re a seasoned baker or just starting, having the correct tools and components ensures your recipe turns out perfectly every time.
Key Ingredients for the Recipe
Start with high-quality flour, like King Arthur all-purpose flour, for consistent results. You’ll also need milk, honey, and a touch of salt to balance the flavors. Cornmeal is essential for dusting and preventing sticking during cooking.
Exact measurements matter. For example, use 437 grams of high-protein white flour and 55 grams of whole spelt flour. These proportions ensure the dough has the right texture and structure.

Must-Have Kitchen Tools
Your kitchen setup plays a crucial role. A sturdy mixing bowl is essential for combining ingredients. A non-stick skillet with a lid helps cook the dough evenly, while parchment-lined baking sheets make handling easier.
If you prefer convenience, a stand mixer can save time during kneading. Don’t forget a tea towel to cover the dough while it rises. These tools streamline the process and help you achieve professional results at home.
Step-by-Step How-To for Making the Dough
Mastering the dough is the foundation of any great bake. It’s where texture, flavor, and structure come together. Follow these steps to ensure your dough is perfectly mixed, kneaded, and fermented for the best results.
Mixing, Autolyse, and Kneading Process
Start by combining all your ingredients in a large bowl. Mix thoroughly to ensure even hydration and gluten development. Use your hand or a stand mixer for this step. Once combined, let the dough rest for 15 minutes in a process called autolyse. This allows the flour to fully absorb the water, making the dough easier to handle.
After the autolyse, knead the dough for about 5 minutes. This helps strengthen the gluten network, giving your bake its structure. Whether you knead by hand or use a mixer, keep the process consistent. The dough should feel smooth and elastic when ready.
Bulk Fermentation and Rising Tips
Once kneaded, let the dough undergo bulk fermentation. This step takes 8-12 hours at room temperature (around 65-70°F). During this time, the dough will double in size and develop bubbles, indicating active fermentation. Cover the bowl with a tea towel to keep the dough from drying out.
Check the dough periodically. If it’s too stiff, add a splash of water. If it’s too runny, sprinkle in a bit more flour. The dough’s softness and texture are influenced by kneading and resting time, so adjust as needed. When the dough is bubbly and doubled, it’s ready for the next step.
Proper fermentation ensures a light, airy texture and rich flavor. Take your time with this step—it’s worth the wait. Once fermented, your dough is ready to be shaped and cooked to perfection.
Cooking Techniques for Perfect English Muffins
Achieving the perfect texture for your baked goods requires mastering the cooking process. Whether you choose a skillet or oven, understanding heat management is key to success. Let’s explore the best methods to ensure your muffins are evenly cooked and delicious.
Skillet Cooking Versus Oven Finishing
Using a skillet is a traditional method that provides a golden crust and soft interior. Preheat your skillet over low heat to avoid burning the outside. Add the dough and cover it to trap heat, ensuring even cooking. This method is quick and effective, with each side taking about 4 minutes.
Alternatively, finishing in the oven can give your muffins a crisp exterior. This method is ideal for larger batches and ensures consistent temperature throughout. However, it may take slightly longer than skillet cooking.

Managing Heat for Even Cooking
Proper heat management is crucial. Start by preheating your skillet or oven to the right temperature. Adjust the heat to low immediately after adding the dough to prevent burning. Use a timer to track the 4-minute cooking time for each side.
Spacing the muffins at least 2 inches apart allows room for rising. A cover helps trap heat, ensuring the inside cooks thoroughly without over-browning the outside. Check for doneness by inserting a thermometer; the internal temperature should reach about 200°F.
| Method | Pros | Cons |
|---|---|---|
| Skillet | Quick, golden crust | Requires monitoring |
| Oven | Consistent heat, larger batches | Longer cooking time |
By mastering these techniques, you’ll create perfectly cooked muffins every time. Whether you prefer the traditional skillet method or the convenience of the oven, proper heat management ensures a delightful result.
Avoiding Common Pitfalls and Adjustments
Even the best recipes can face challenges, but knowing how to troubleshoot ensures success. From sticky dough to uneven texture, small adjustments can make a big difference. Here’s how to identify and fix common issues for perfect results every time.
Troubleshooting Texture and Thickness
If your dough feels too sticky, add flour in small increments. This helps achieve the right consistency without over-drying. For a thicker texture, ensure proper fermentation. Fermentation takes about 8-12 hours at room temperature. If the dough flattens out, it may need more flour or a shorter rise time.
Cornmeal plays a key role in preventing sticking and improving texture. Dust your cooking surface generously for even cooking. Follow these instructions carefully to ensure a nicely textured side that holds nooks and crannies.
Adapting for Environment and Flour Variations
Environmental factors like humidity and temperature can affect your dough. In warm or humid conditions, reduce fermentation time to prevent over-proofing. Place the dough in a warm spot for consistent results. If your kitchen is cool, extend the rise time slightly.
Different flours can also impact texture. High-protein flours create a firmer dough, while whole-grain flours add density. Adjust hydration levels based on the flour type. Store the dough for up to a day in the fridge if you need to delay baking.
| Issue | Solution |
|---|---|
| Sticky Dough | Add flour in small increments. |
| Flattened Texture | Shorten fermentation time. |
| Uneven Cooking | Use cornmeal for even cooking. |
| Over-Proofing | Reduce rise time in warm conditions. |
By understanding these adjustments, you can adapt to any environment or ingredient variation. Cook each side for 5 minutes to ensure even browning. With these tips, you’ll master the art of troubleshooting and achieve perfect results every time.
Creative Ways to Enjoy sourdough english muffins
Transform your meals with these versatile and flavorful creations. Whether you’re looking for a quick breakfast or a hearty dinner side, these muffins offer endless possibilities. Their chewy texture and tangy taste make them a standout addition to any meal.
Innovative Serving Ideas
There are countless ways to enjoy these homemade delights. Slather them with homemade butter and a sprinkle of cinnamon sugar for a sweet treat. Drizzle honey or jam for a quick, satisfying snack. Their artisan quality makes them a perfect alternative to store-bought rolls.
For a savory twist, try them as a base for open-faced sandwiches. Top with avocado, smoked salmon, or a fried egg for a gourmet touch. Their nooks and crannies hold spreads and toppings beautifully, enhancing every bite.
Pairing with Breakfast Favorites
These muffins shine as part of a hearty breakfast. Turn them into sandwiches with scrambled eggs, crispy bacon, and melted cheese. Their tangy flavor complements the richness of breakfast meats and eggs perfectly.
Toast them lightly to bring out their flavor and texture. Serve alongside fresh fruit, yogurt, or a smoothie for a balanced meal. Their versatility makes them a go-to option for busy mornings or leisurely brunches.
- Spread with butter and cinnamon sugar for a sweet treat.
- Use as a base for breakfast sandwiches with eggs, ham, and cheese.
- Pair with avocado or smoked salmon for a savory option.
- Toast lightly and serve with fresh fruit or yogurt.

Sourdough English Muffins
- Total Time: 30 minutes
- Yield: 8 muffins 1x
Description
Soft and chewy with a signature tangy flavor, these Sourdough English Muffins are perfect for breakfast sandwiches, toasting with butter, or slathering with jam. No oven needed—these cook right on the stovetop for a crispy, golden crust and a fluffy interior filled with nooks and crannies!
Ingredients
- 2 cups (480g) active sourdough starter (100% hydration)
- 1 cup (240ml) whole milk, warmed (~90°F/32°C)
- 3 cups (360g) all-purpose flour
- 1 tablespoon sugar
- 1 teaspoon salt
- 2 tablespoons unsalted butter, melted
- ½ teaspoon baking soda
- Cornmeal or semolina flour (for dusting)
Instructions
1. Prepare the Dough (Overnight Rise)
- In a large bowl, mix sourdough starter, warm milk, sugar, and melted butter until combined.
- Add the flour gradually, stirring until a sticky dough forms.
- Cover the bowl with plastic wrap and let it ferment at room temperature (70-75°F) for 8-12 hours (overnight). The dough should double in size and be bubbly.
2. Add Baking Soda & Shape
- Sprinkle baking soda and salt over the dough and knead lightly to incorporate.
- Turn the dough onto a floured surface and roll it out to ½-inch thickness.
- Cut into 3-4 inch rounds using a biscuit cutter or the rim of a glass.
- Place the rounds on a baking sheet dusted with cornmeal. Cover and let them rest for 30-45 minutes, until slightly puffy.
3. Cook on the Stovetop
- Heat a dry cast-iron skillet or griddle over medium-low heat.
- Carefully transfer muffins to the skillet, keeping them at least 1 inch apart.
- Cook for 5-7 minutes per side, until golden brown and puffed up. Adjust heat to prevent burning.
- Transfer to a wire rack and let them cool before splitting.
4. Serve & Enjoy!
- Split with a fork for the best nooks and crannies.
- Toast and serve with butter, jam, honey, or eggs for a delicious treat!
Notes
- For a stronger sourdough tang, let the dough ferment in the fridge for up to 24 hours.
- No cutter? Shape into balls and flatten slightly.
- Want extra fluffiness? Let the shaped muffins rest for 1 hour before cooking.
- Storage: Store at room temperature for 3 days, refrigerate for a week, or freeze for up to 3 months.
- Prep Time: 10 minutes
- Cook Time: 15 minutes
- Category: Breakfast
- Method: Muffins Recipe
- Cuisine: English
Nutrition
- Serving Size: 8 muffins
- Calories: ~180 kcal per muffin
- Sugar: 2 g
- Sodium: 320 mg
- Fat: 4 g
- Saturated Fat: 2 g
- Carbohydrates: 30 g
- Fiber: 1 g
- Protein: 5 g
- Cholesterol: 10 mg
Keywords: SourdoughEnglishMuffins, HomemadeBread, SourdoughRecipes, BreakfastIdeas, NoOvenBaking
Enhancing Flavor and Nutritional Benefits
Unlock the full potential of your baking by exploring the flavor and nutritional benefits of fermentation. This process not only deepens the taste of your creations but also enhances their health benefits. From improved nutrient absorption to better digestion, fermentation transforms simple ingredients into something extraordinary.
The Role of Fermentation in Flavor Development
Fermentation works by breaking down complex nutrients in the dough, creating a richer, more complex flavor profile. It also reduces phytic acid in grains, making nutrients like B vitamins and fiber more accessible. This process gives your baked goods a unique tanginess that’s hard to replicate.
Ingredients like milk play a key role in enhancing texture and flavor. They add richness and smoothness to the dough, making it more enjoyable to eat. The rise of the dough during fermentation is a clear indicator of effective yeast activity, which contributes to both taste and nutritional benefits.
Nutritional Advantages of Homemade Baking
Homemade baking offers fresher ingredients and greater control over what goes into your food. Unlike store-bought options, you can avoid preservatives and artificial additives. This ensures a healthier, more natural product that’s better for your body.
Fermented baked goods are also easier to digest. The process breaks down gluten and other complex proteins, making them gentler on the stomach. Plus, the increased bioavailability of minerals means your body can absorb more nutrients from each bite.
| Aspect | Homemade | Store-Bought |
|---|---|---|
| Ingredient Quality | Fresh, natural ingredients | Often contains preservatives |
| Nutritional Value | Higher nutrient absorption | Lower nutrient bioavailability |
| Flavor | Rich, complex, and tangy | Standardized, less unique |
By choosing homemade baking, you’re not just making food—you’re creating a healthier, more flavorful experience. Whether it’s the tang of fermentation or the richness of fresh milk, every ingredient plays a part in elevating your bake.
FAQ
How do I know if my sourdough starter is ready to use?
Your starter is ready when it’s bubbly, has doubled in size, and passes the float test. Drop a small piece into water—if it floats, it’s active and ready for baking.
What ingredients are essential for making sourdough English muffins?
You’ll need flour, water, salt, sugar, and an active starter. Cornmeal is also helpful for dusting the pan to prevent sticking.
Can I use a stand mixer for kneading the dough?
Yes, a stand mixer with a dough hook can simplify the kneading process. However, hand kneading works just as well and helps you feel the dough’s texture.
How long should I let the dough rise during bulk fermentation?
Let the dough rise at room temperature for 4-6 hours, or until it’s doubled in size. The time may vary depending on your kitchen’s warmth.
Should I cook the muffins on a skillet or in the oven?
A skillet is ideal for achieving the classic nooks and crannies. Finish them in the oven if you prefer a more even bake.
Why are my muffins too dense or thick?
Dense muffins often result from underproofing or over-kneading. Ensure your dough rises properly and handle it gently during shaping.
What are some creative ways to serve sourdough English muffins?
Try them toasted with avocado, eggs, or jam. They also make a great base for mini pizzas or sandwiches.
How does fermentation enhance the flavor of the muffins?
Fermentation develops a tangy, complex flavor and breaks down gluten, making the muffins easier to digest.
Can I store homemade sourdough English muffins?
Yes, store them in an airtight container for up to 3 days or freeze them for longer storage. Reheat before serving for the best texture.
Conclusion
Bringing your homemade creations to life is a rewarding journey. From preparing the starter to cooking on a sheet or in the room, each step builds toward a delicious result. Remember to measure ingredients like a teaspoon of salt for balanced flavor.
Feel free to experiment with the recipe. Adjust based on your kitchen environment or try creative twists. Sharing your results and feedback can inspire others to make sourdough their own way.
Homemade baking is an art that brings pride and satisfaction. We encourage you to explore more recipes and continue your baking adventure. Don’t forget to print or save this guide for future use!